Integration with Discord
In the previous release, we added integration with Telegram, and now Cerebro is compatible with Discord!
The integration links Cerebro tasks and My Space pages with Discord text chats for two-way text messaging and file exchange. You can change task statuses, write reports, request information on a task, and much more directly from chats.
Just like in Telegram, there are two types of chats:
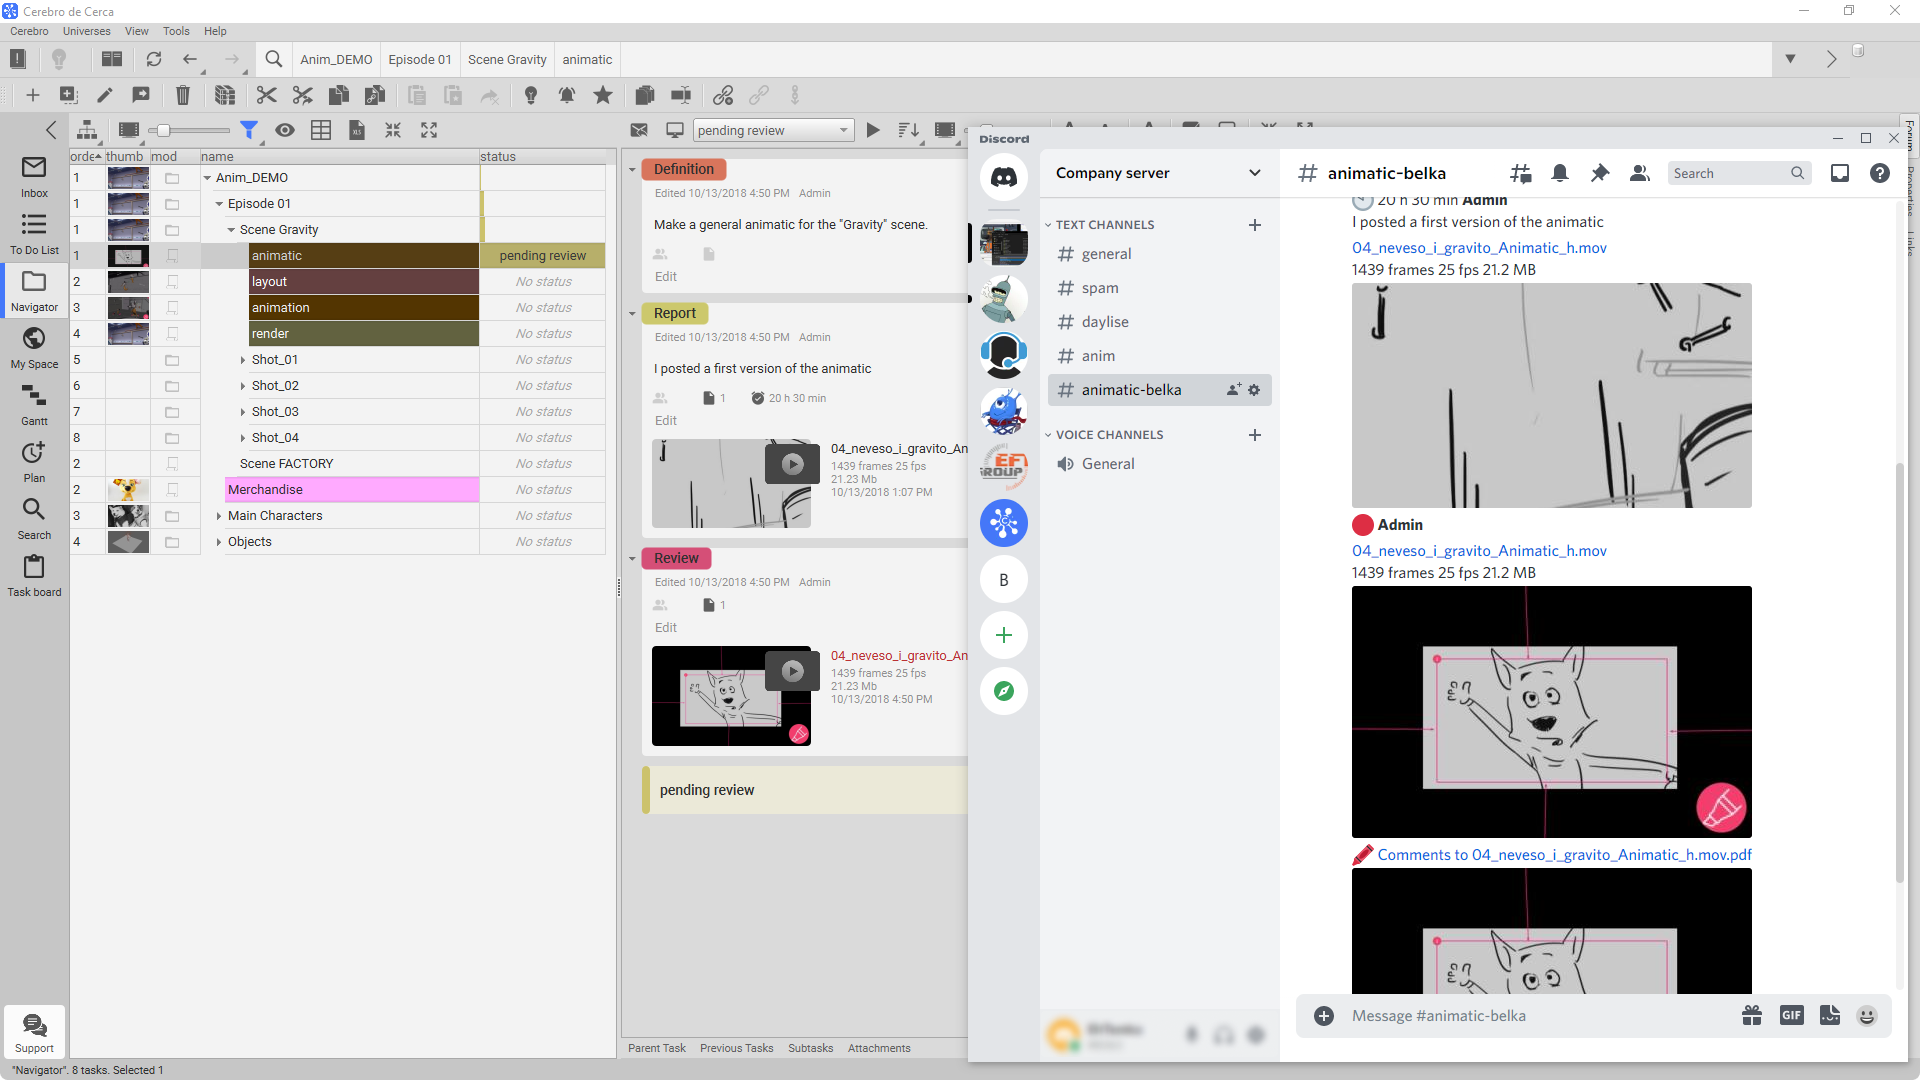
Task Chat: When a task is connected to a Discord chat, the conversation is duplicated in both systems (Aquí-y-allá).
My Space Chats: when a My Space page is connected to a text chat. All updates on tasks from the page selection are sent to the Discord chat. You can also send messages to these tasks from the chat.
Creating chats
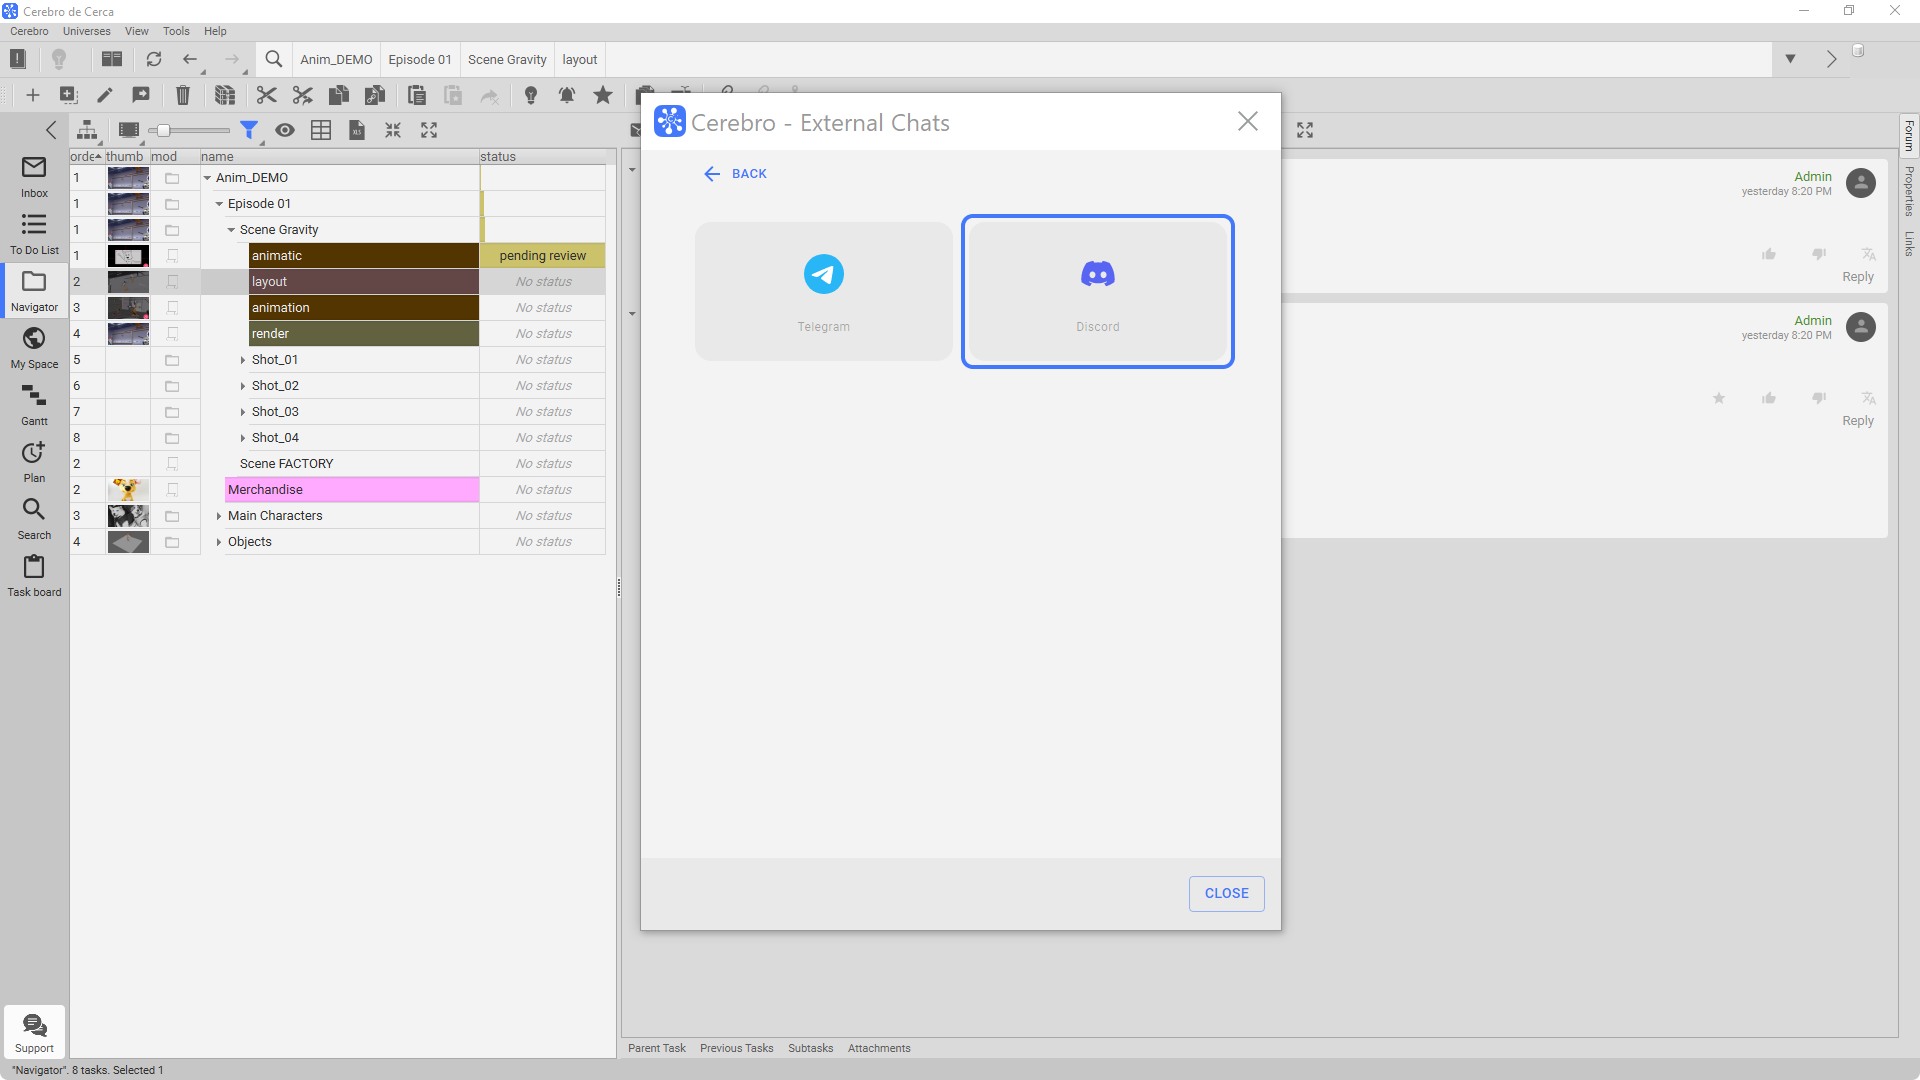
Unlike Telegram chats which can be created directly from Cerebro, in Discord, the entire linking process with Cerebro is controlled in the application itself.
You need to:
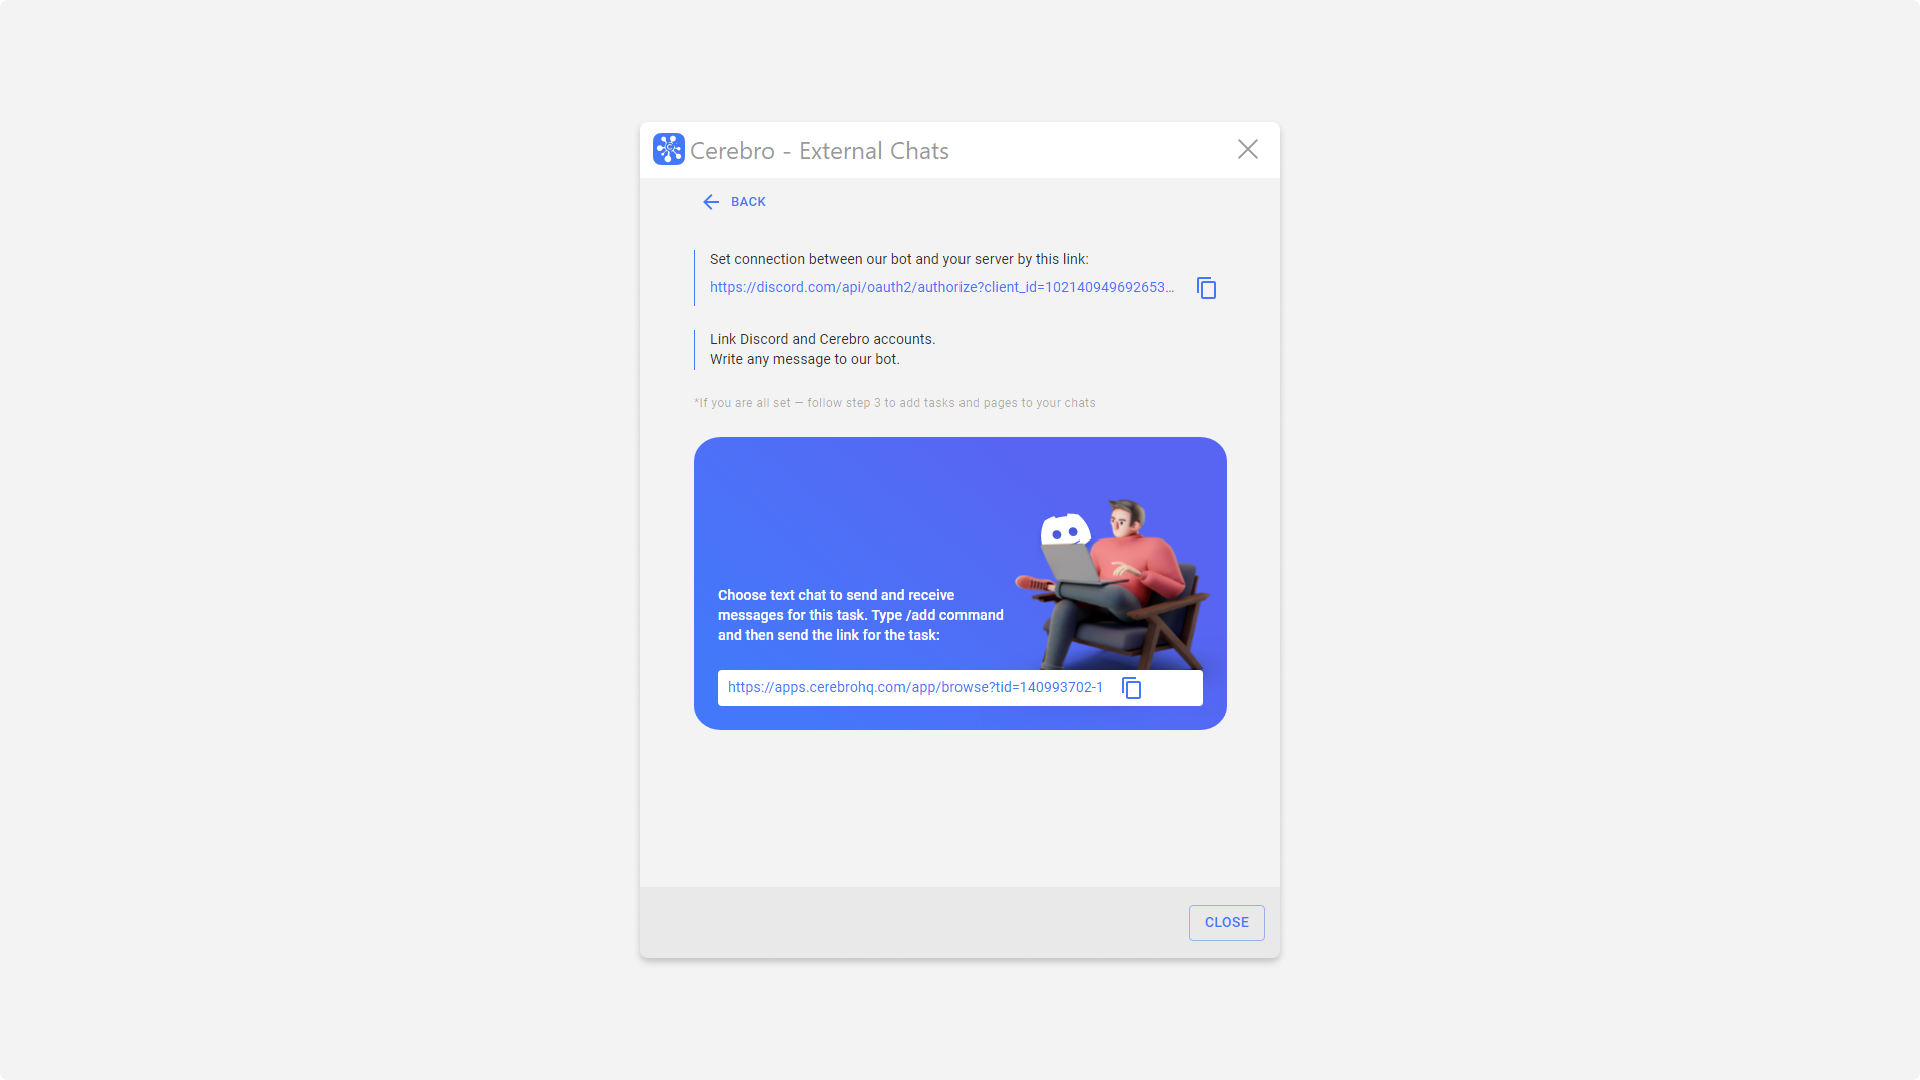
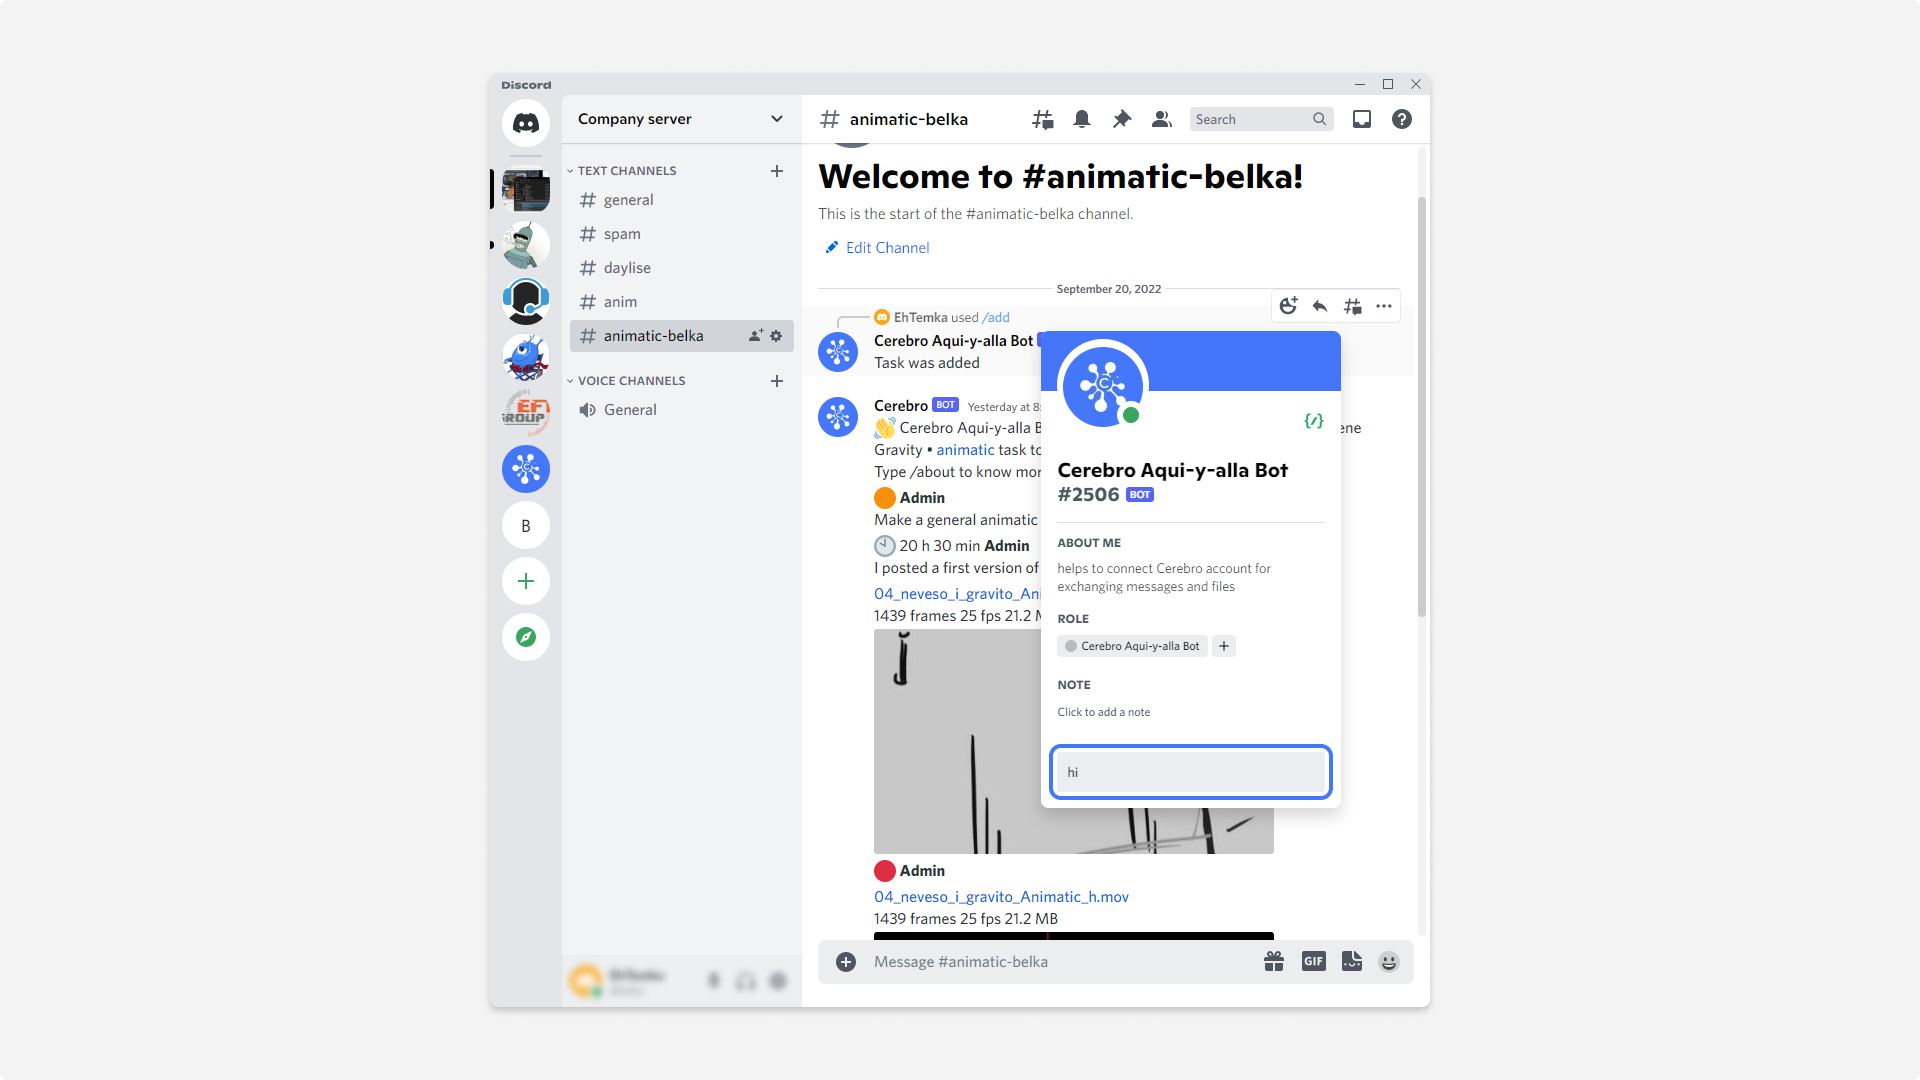
— connect the Cerebro Aqui-y-alla Bot to your Discord server once;
— link your Cerebro account to Discord in a private chat with the Bot (use the /login command);
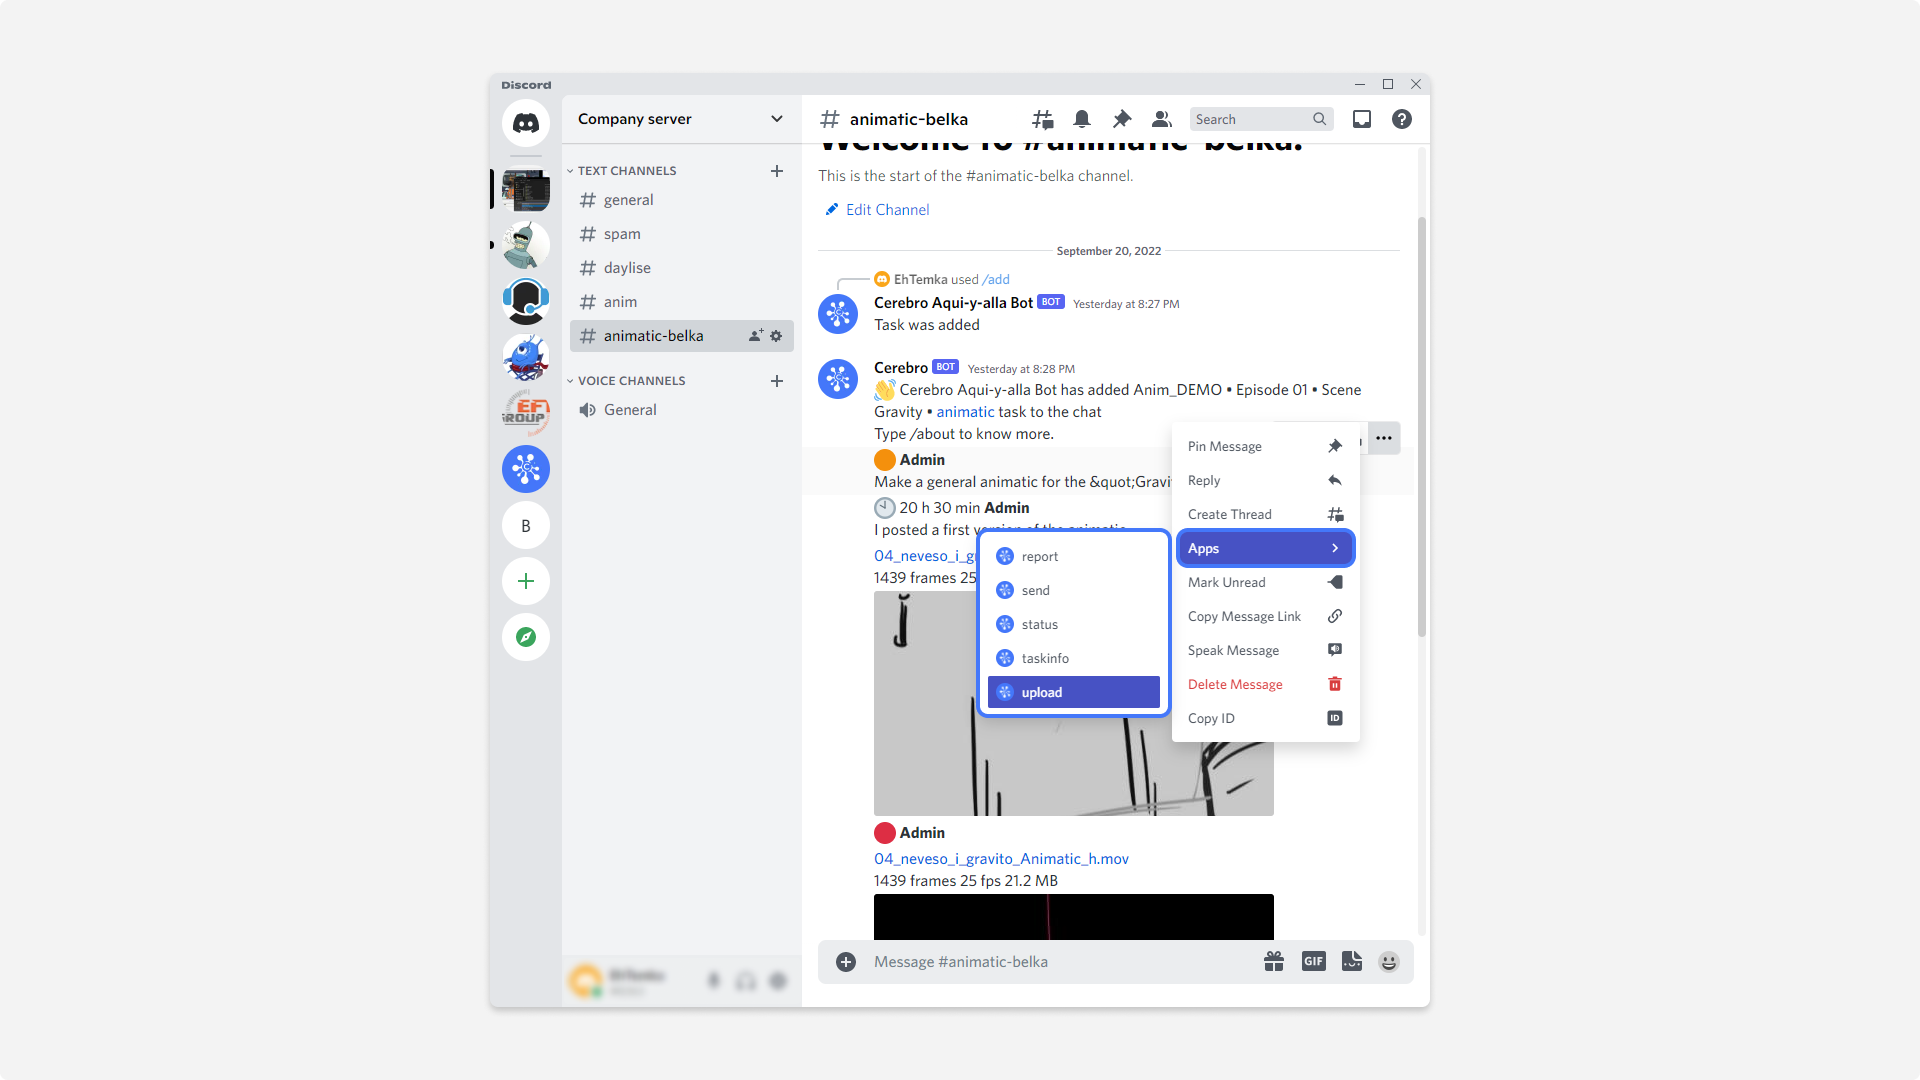
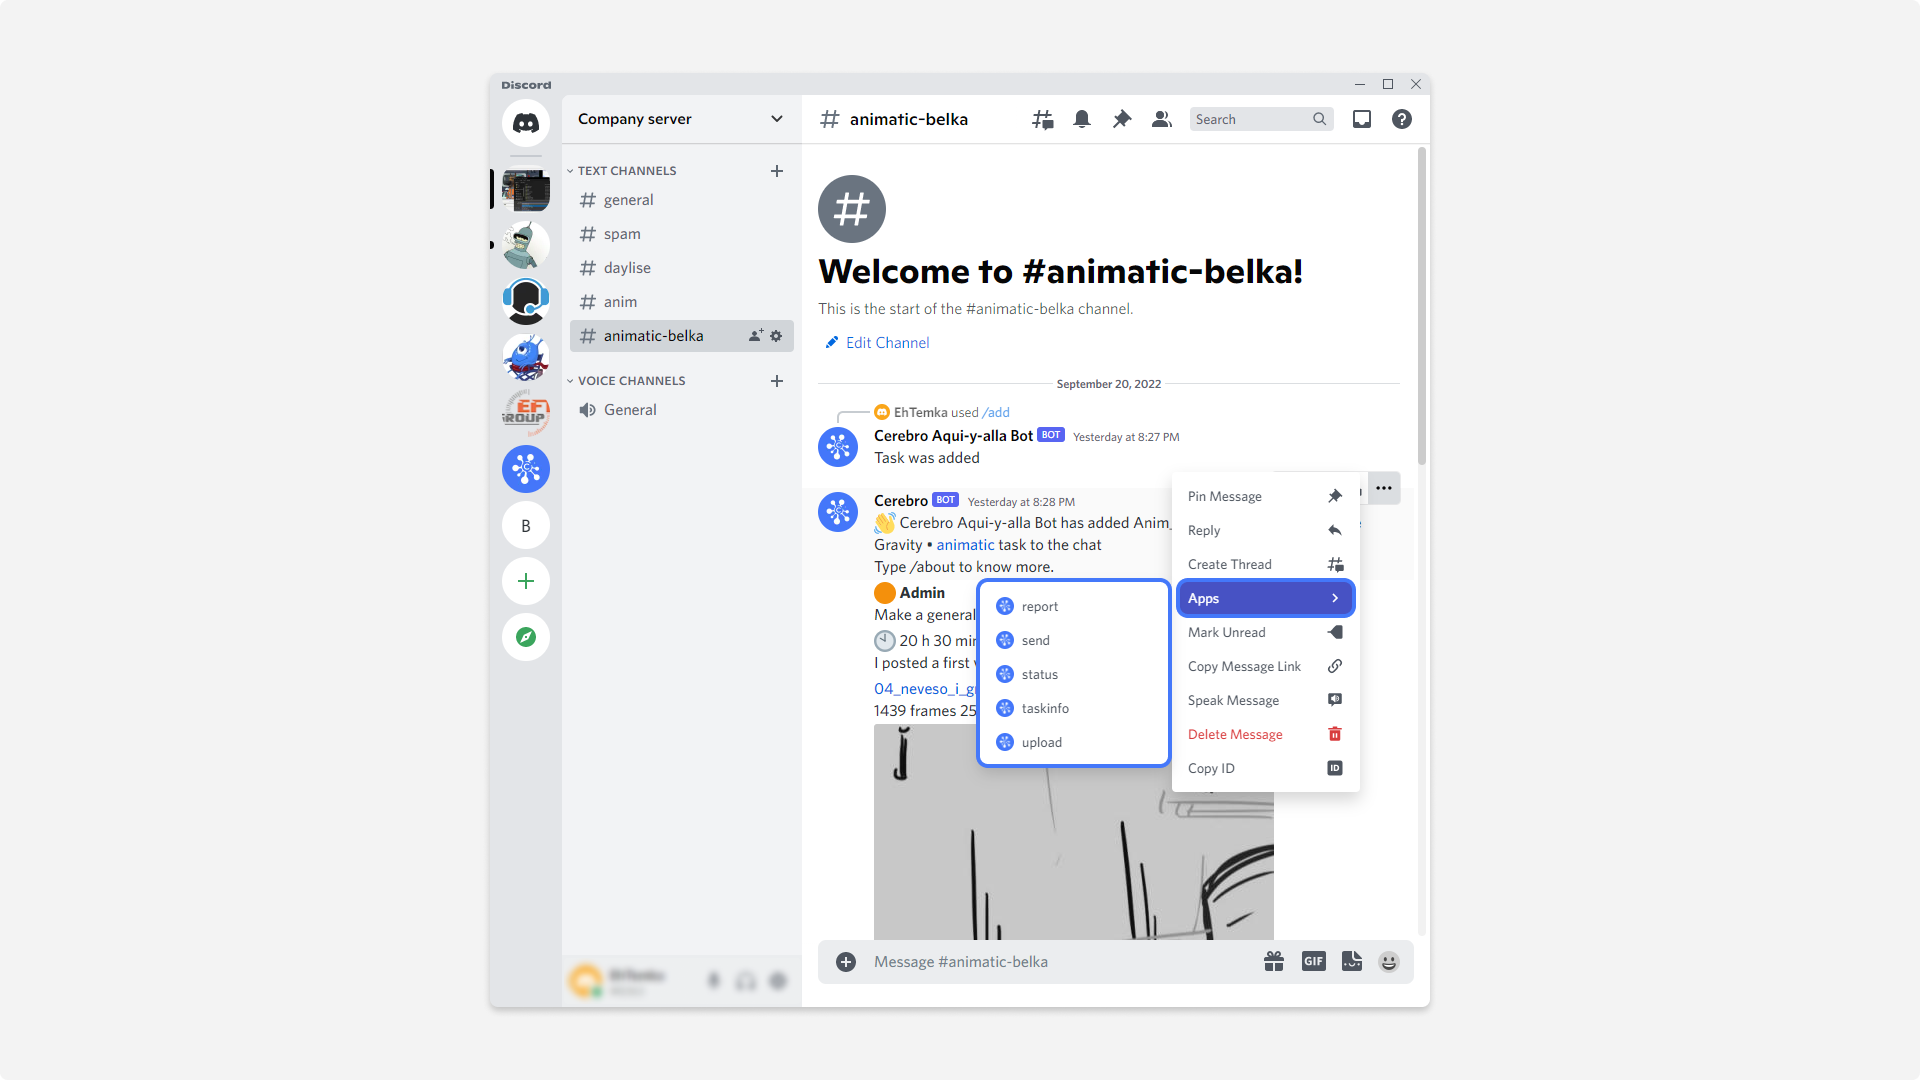
— after that, it will be possible to link any tasks and pages to Discord chats by simply using the /add command. You only need to receive links to tasks or pages from Cerebro that can be sent using this command.
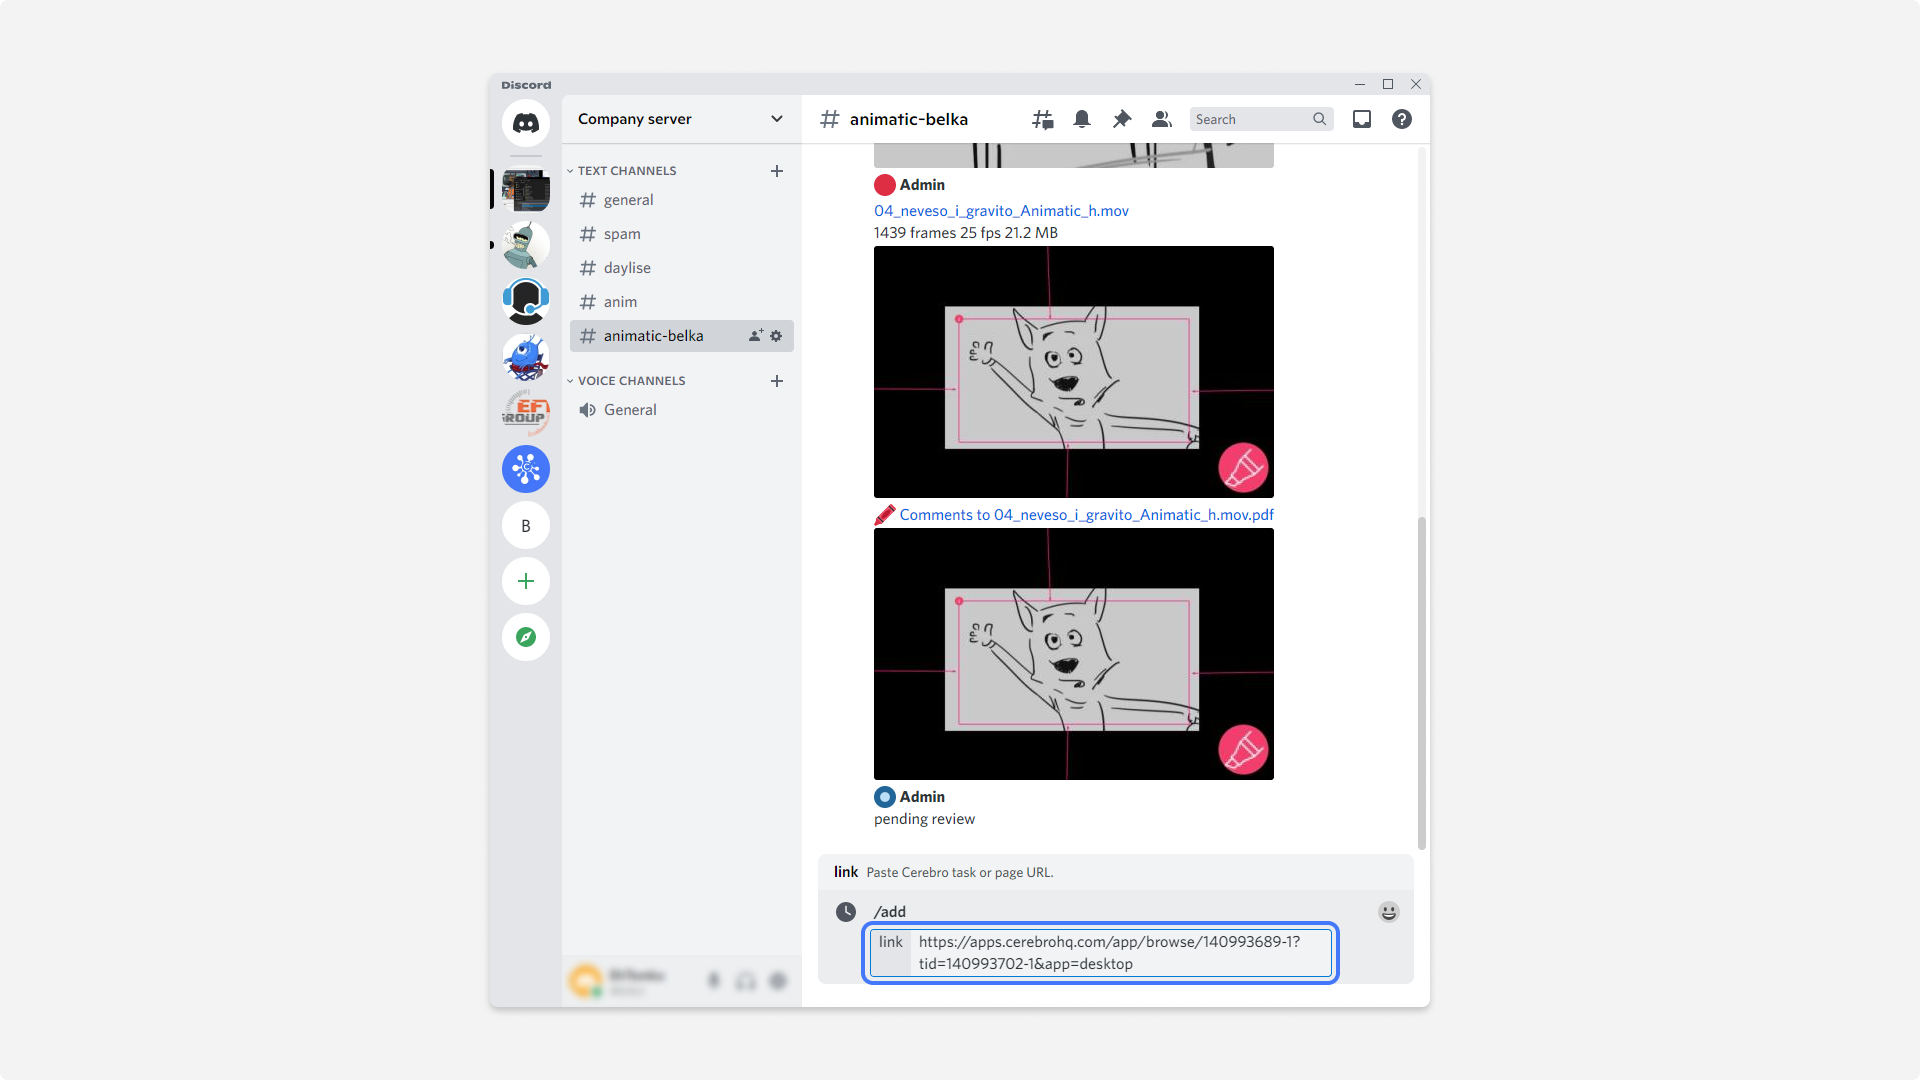
After you add a task to the chat, all of your messages will be sent there. Any message written in the chat by linked users will automatically be sent to Cerebro.
In order to enable your colleagues to send messages to Cerebro tasks from chats, simply link Cerebro to Discord in a private message with the Bot (use the /login command).
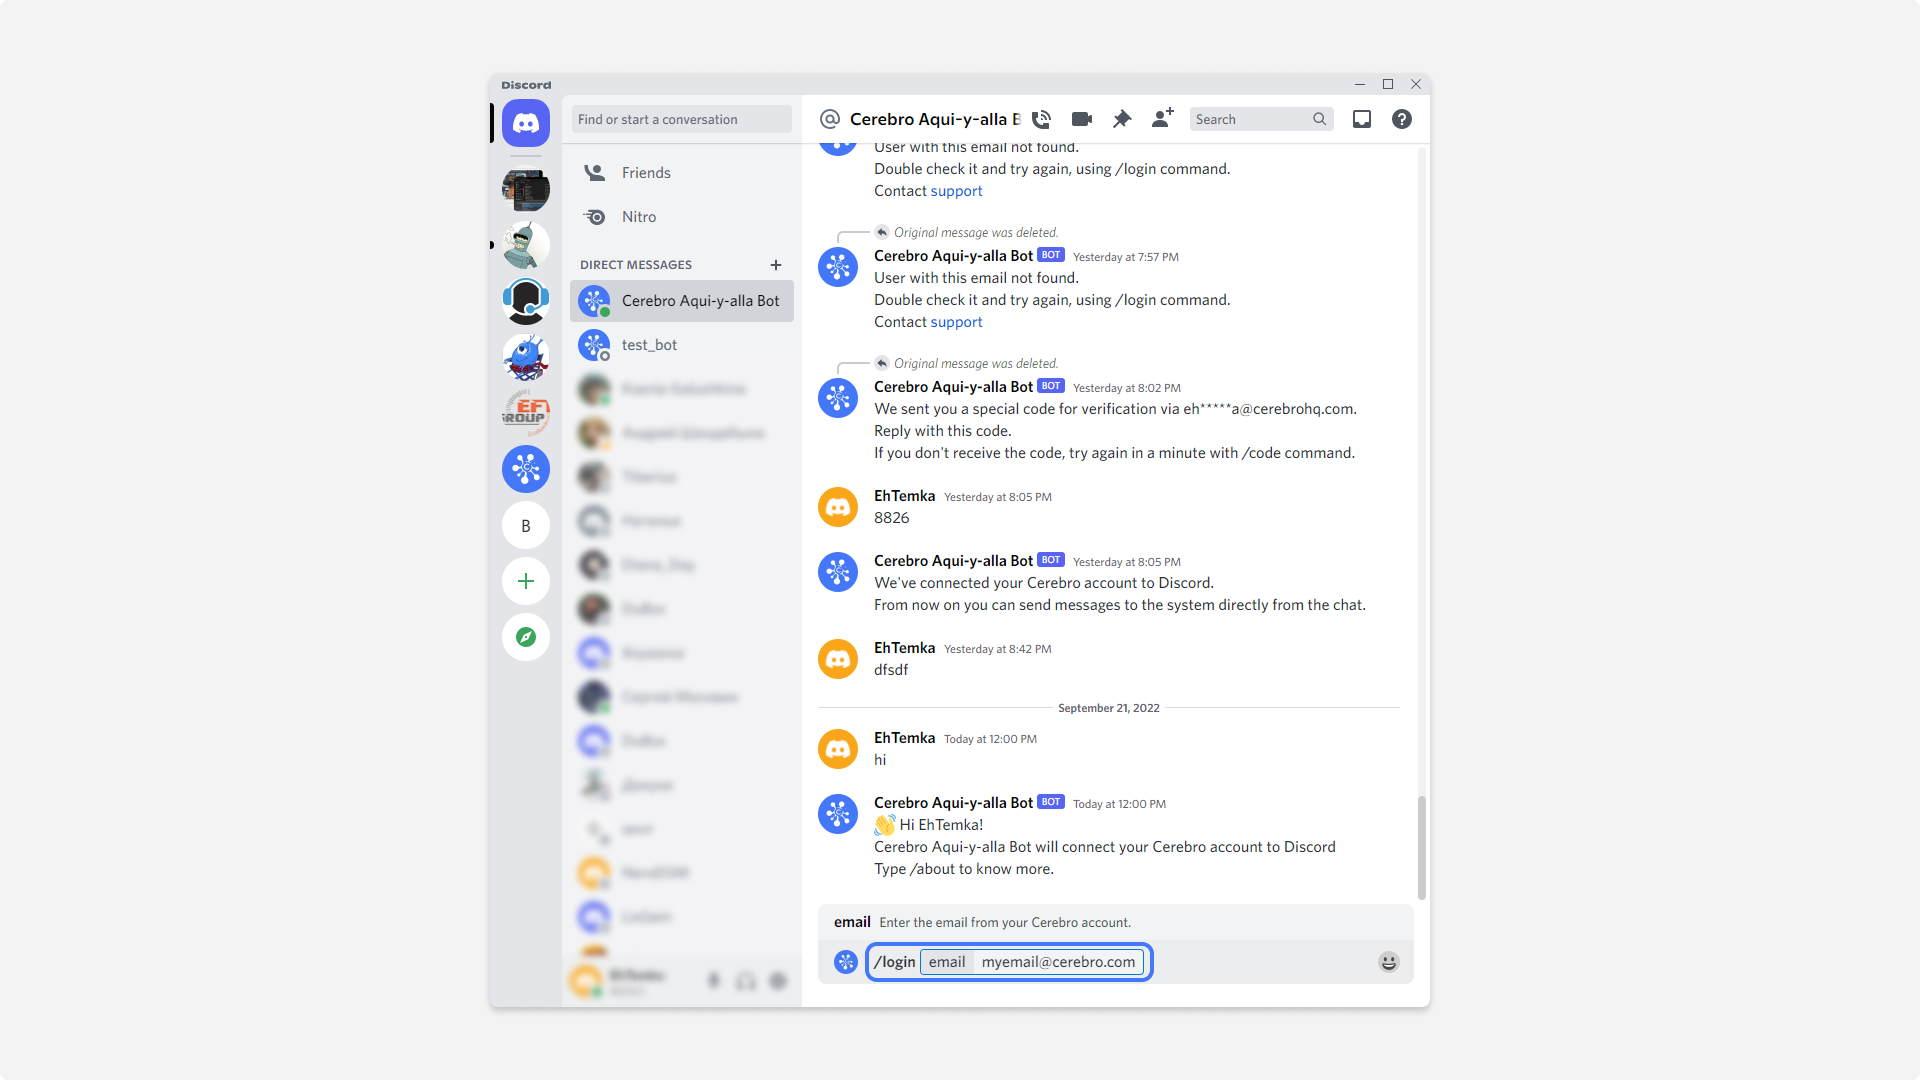
One task can be linked to several chats, and several tasks can be linked to one chat. In this case, you will need to write a ‘Reply’ to messages from the Bot for the message to be sent to Cerebro. It will make it clear which task it should be sent to. Other messages will be ignored.
After a task is added to the chat, the chat will appear in Cerebro. It can be edited or deleted. In the chat settings, you can specify the user for whom the chat will be updated. By default, this is the user who linked the task to Discord.
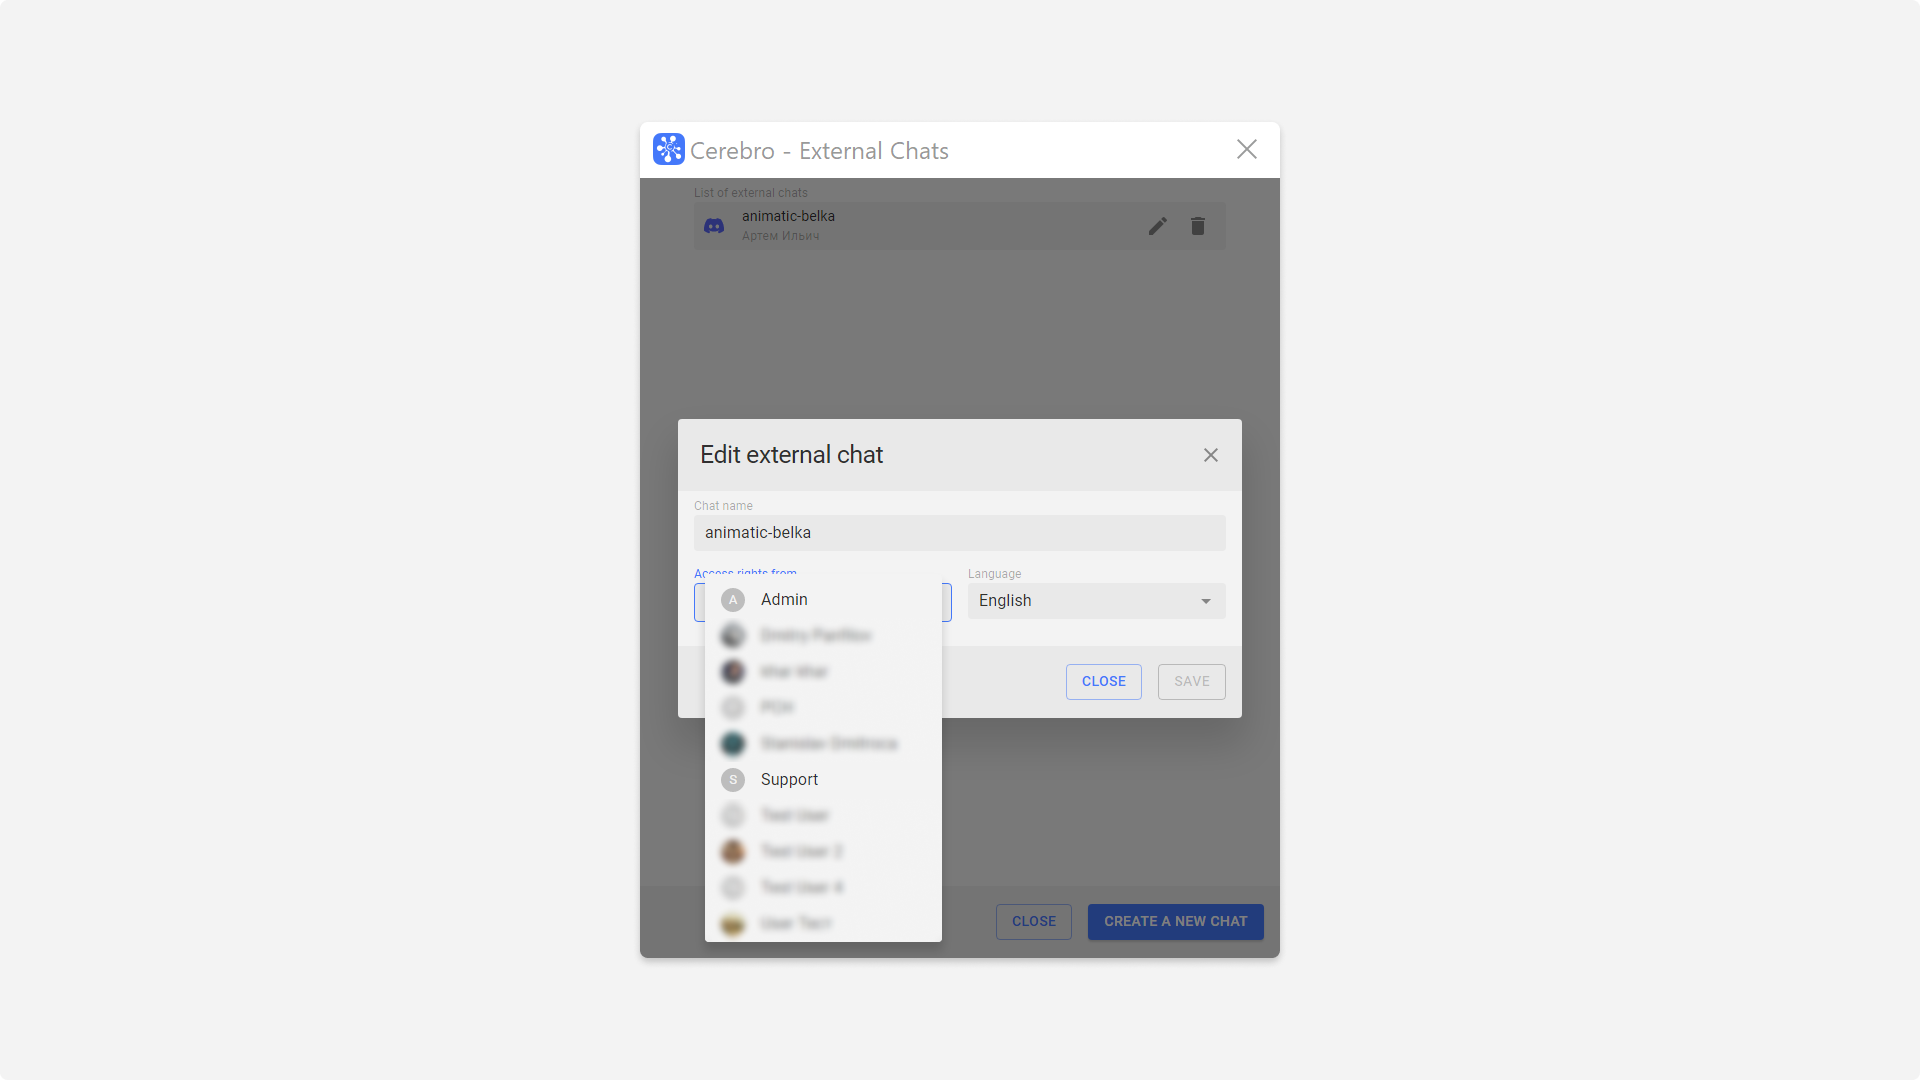
Thus, you can configure which messages will be sent to the chat, for example, only the ones visible to the client. You can also set up whether messages will be anonymous, if your group visibility is turned on, and which tasks will be updated (for page chats).
My Space Chats
Chats for My Space pages are added in the same way as for tasks – by using /add command. Copy the link to the page you want to link and insert it in /add command menu in the desired chat. The link can be copied both from the home chat interface, and just from a specific page.
Note: The page must be saved in the Universe.
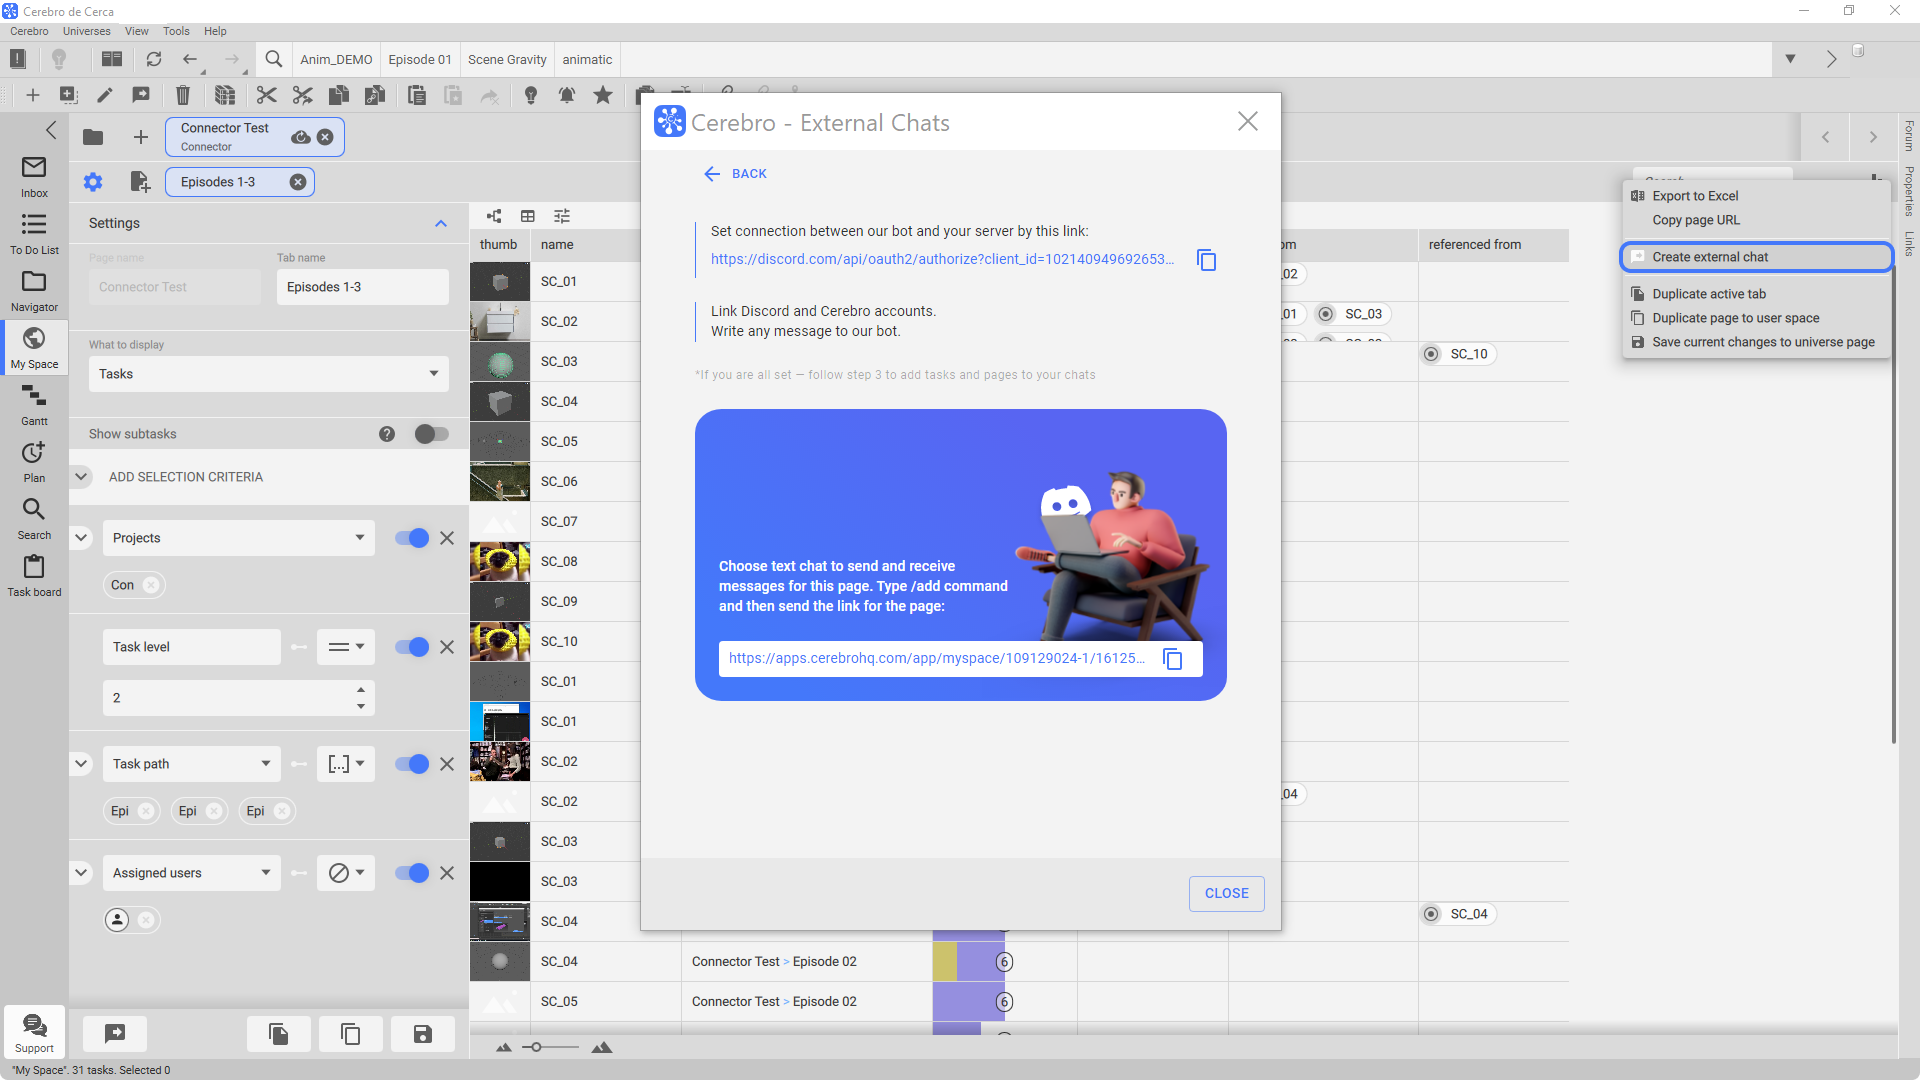
Chats are created for page tabs, it means you can link one or more tabs.
After linking is complete, all updates on tasks included in the tab will be sent to the chat. In order for the message to be sent to Cerebro, you will need to write a “Reply” to messages from the Bot. It will make it clear which task it should be sent to. Other messages will be ignored.
Therefor, you can set up pages for dailies, daily reports, tasks for the coming week, and any other tasks and messages that may be actively discussed by your team. Have a discussion in the Discord chat, and send important, final comments to Cerebro to the relevant tasks.
Pages can have several chats at once, and one chat can have several pages at the same time.
Sending files
Unfortunately, Discord has size limits for files that can be sent and received by a Chat Bot. They are 8 MB for both sending files to the chat and receiving. But we have a solution! 😉
If task files do not exceed the limits, we just post them in chats, otherwise we will send you a file download link.
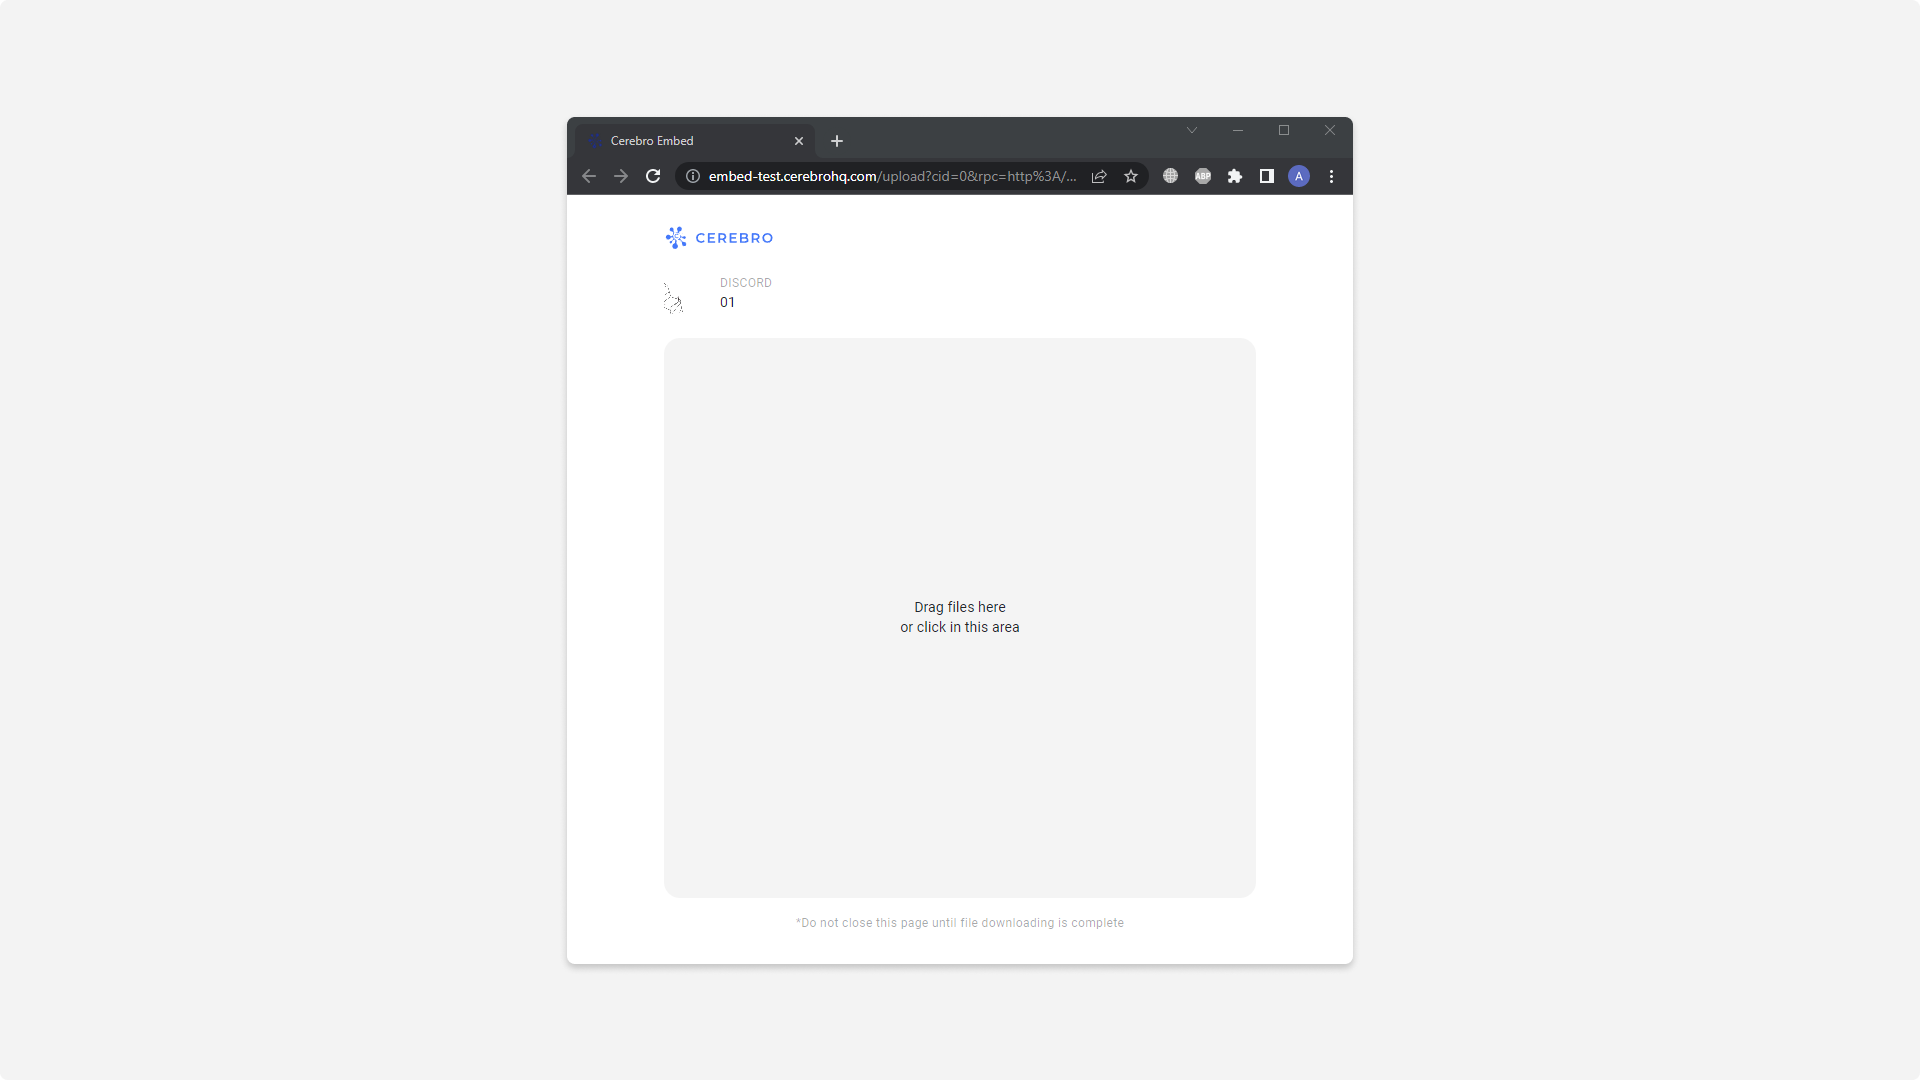
To send large files from Cerebro chats, use the /upload command. This command will take you to a web page where you can upload any files to the task.
Commands
Bot supports commands for sending reports, changing task statuses, sending files, getting help on tasks. You can see the full command list in the app by running the /help command in any chat. The commands that can be executed by replying to a message are duplicated in the message menu, see Apps section.
Telegram — Update commands in multichats
We have added the /send command for multichats, i.e. chats with multiple tasks or My Space pages. This command will help you quickly send a message to the desired task.
If the command is executed by ‘Replying’ to any message, we will suggest you to select a task and we’ll send this message there.


By simply running a command, you will get options to select a task and write a new message.
For all commands in multichats that are related to tasks, such as report, status change and others, we have added the ability to select the task to which you want to apply the command. Now you don’t have to look for a Cerebro message in order to run a command by writing a ‘Reply’. You can simply write it first and then select a task from the suggested list.
If the required task is not in the list or is very large, you can find it by writing its name or path in the text search field.
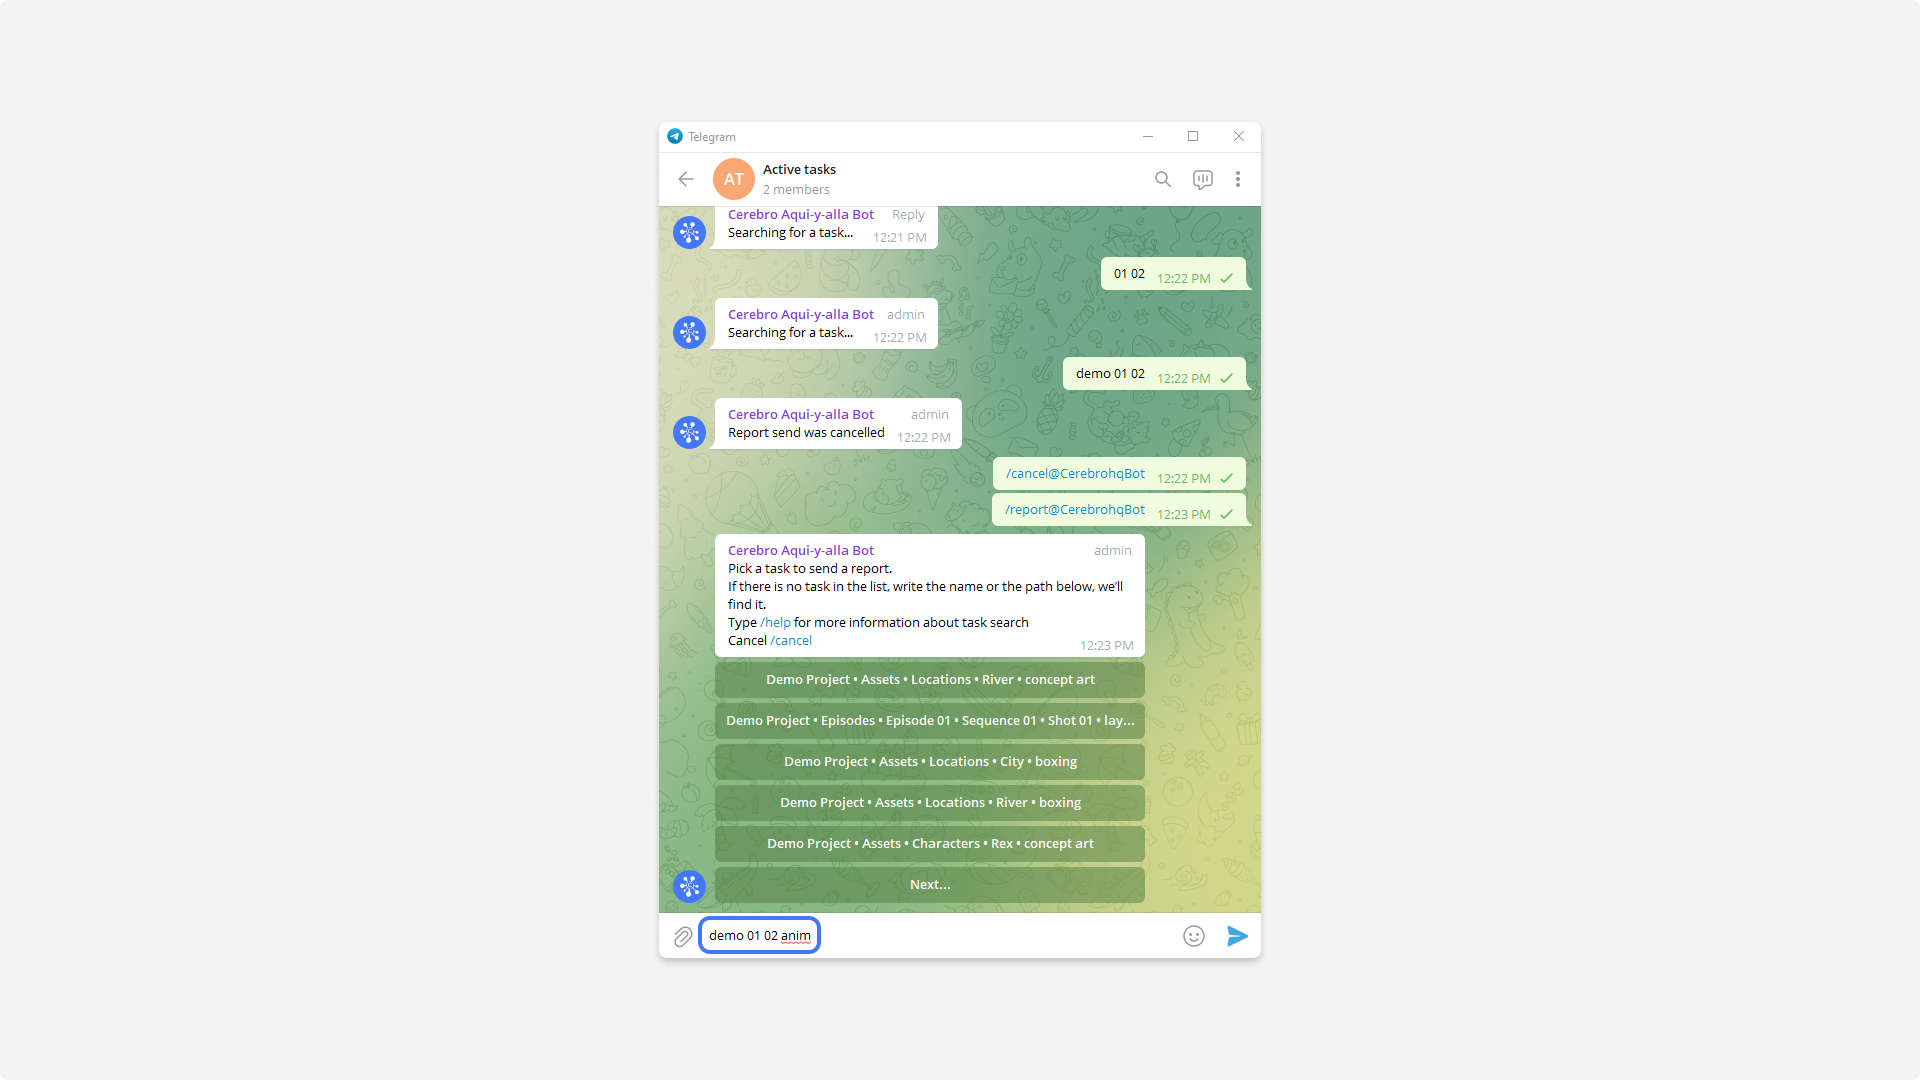
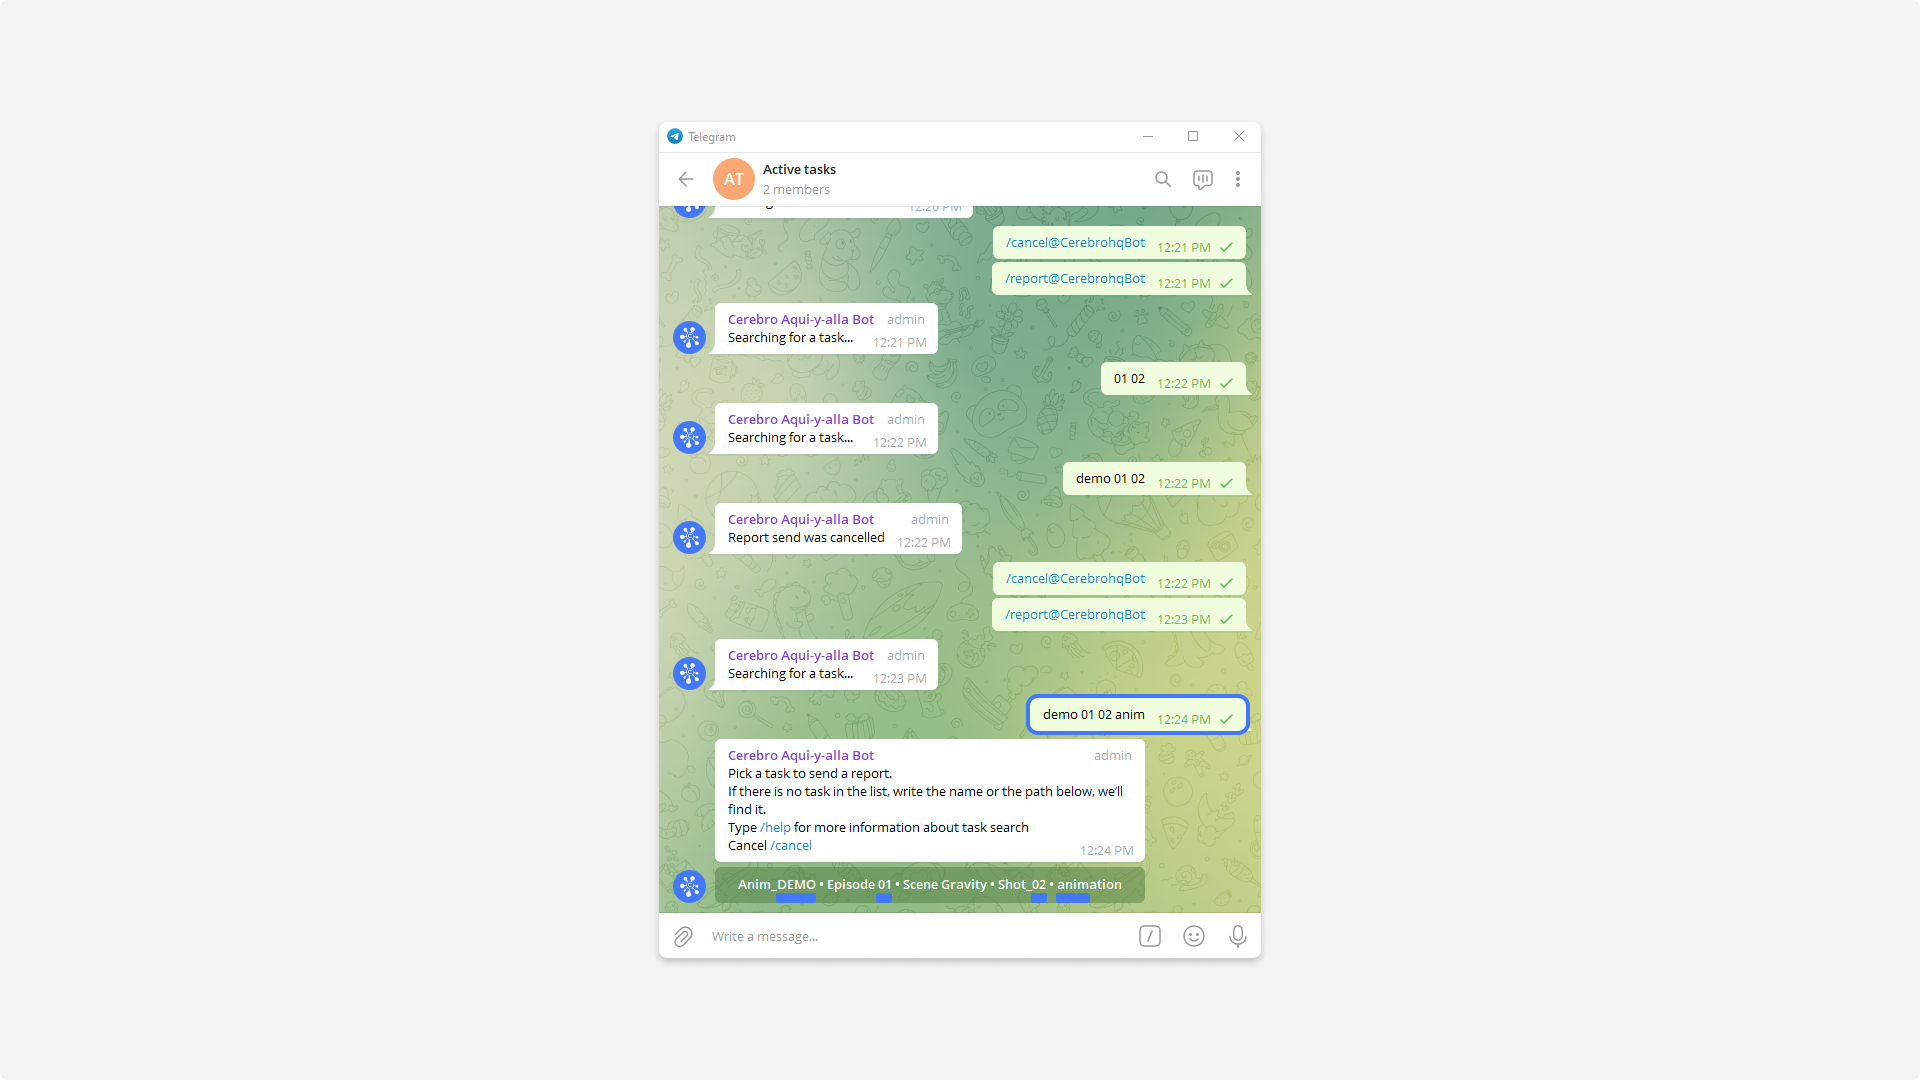
The search has a non-strict start and end, and spaces mean any separating characters between words.
For example, you have a task MyProject/Product/Episodes/Ep01/Sc20
You can find it by writing: project 1 20
Desktop – Page and tab order in My Space and more
We have added the ability to change the order of pages and tabs. Just ‘grab’ the element you want and drag it to a new location.
We have added tooltips for the ‘Condition’ column with detailed information on all the special properties of the task.
Adjusted the color scheme to the rest of the tabs.
Improved the accuracy of time values on charts to minutes.
Desktop – Fixed Issues
— Fixed a bug in the Mirada thumbnail generation mechanism, when individual files were perceived as a sequence.
— Removed the annoying blank page that occurred when comments were exported to PDF.
— Resolved web component access issues for individual users.
— Brought back the ability to quickly copy task names. To do this, use the usual copy command (Ctrl+C) and then paste it as plain text (Ctrl+Shift+V).